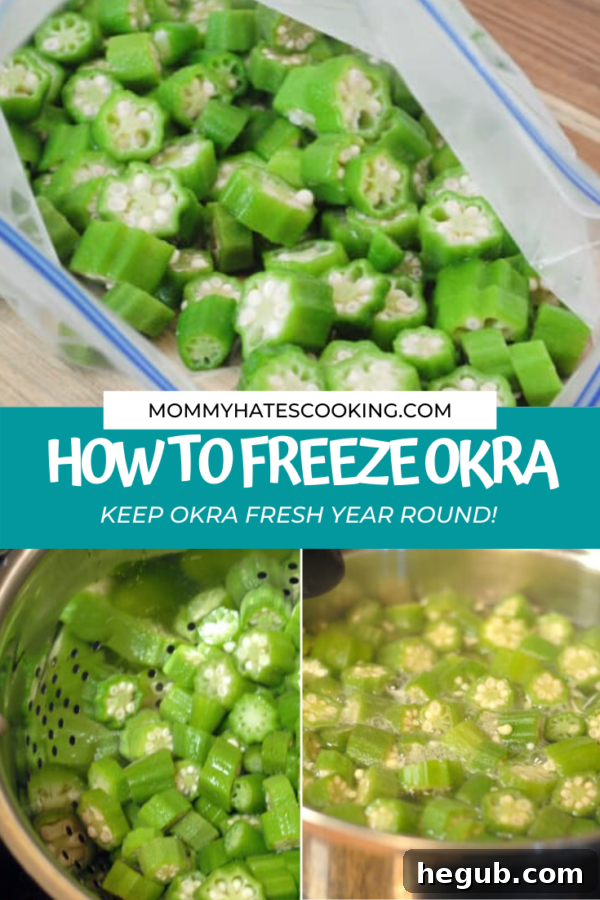
A Gardener’s Guide to Freezing Okra: Preserve Your Harvest All Year Long
As the vibrant summer sun blesses our gardens, bringing forth an abundance of fresh produce, one vegetable often stands out for its unique flavor and versatility: okra. For passionate gardeners and home cooks alike, knowing how to properly preserve this beloved crop is a culinary superpower. Freezing okra allows you to enjoy its distinct taste and texture in a myriad of dishes – from hearty gumbos and spicy curries to crispy fried delights and grilled perfection – long after the growing season has ended. This comprehensive guide will walk you through the simplest yet most effective methods for freezing okra, ensuring you have a steady supply of garden-fresh goodness throughout the year.
Why Preserve Your Garden Okra?
The joy of harvesting your own fresh okra is undeniable, but what do you do when your plants are producing more than you can possibly consume in a short period? Preserving your okra isn’t just about preventing waste; it’s about extending the pleasure of your garden’s bounty. By freezing, you lock in the nutritional value, vibrant color, and distinctive flavor of freshly picked pods, making them available whenever a recipe calls for that touch of okra magic. It’s a smart, economical, and delicious way to ensure your family enjoys healthy, homegrown vegetables regardless of the season.
The Essential Role of Blanching for Perfectly Frozen Okra
While some might advocate for simply chopping and freezing okra, the true secret to preserving its quality for extended periods lies in a simple yet crucial step: blanching. This method, often overlooked by novice preservers, is what distinguishes good frozen okra from truly exceptional frozen okra. It’s the key to maintaining not only the flavor and color but also the texture that makes okra so enjoyable in your favorite recipes.
Understanding Blanching: More Than Just a Quick Boil
Blanching is a rapid cooking process where vegetables are briefly immersed in boiling water, then immediately transferred to an ice bath to halt the cooking process. For okra, this brief heat treatment accomplishes several vital tasks. Firstly, it cleanses the surface of any lingering dirt or microorganisms. More importantly, blanching effectively stops the enzymatic actions that naturally lead to the deterioration of vegetables over time. These enzymes are responsible for changes in color, flavor, and nutrient content, even in sub-zero temperatures. Without blanching, okra can develop an off-flavor, lose its vibrant green hue, and become mushy or tough when thawed.
Think of blanching as pressing a pause button on your okra’s natural aging process. By deactivating these enzymes, you significantly extend the shelf life and preserve the quality of your frozen produce. While it adds an extra step to the freezing process, the improved taste and texture of blanched frozen okra are well worth the minimal effort, ensuring that your culinary creations are always at their best.
The consequences of skipping the blanching step can be quite noticeable. Okra frozen without this pre-treatment may emerge from the freezer with a duller color, a less appealing flavor, and a compromised texture that detracts from its overall appeal in dishes. Therefore, if you’re aiming for the highest quality and longest-lasting frozen okra, blanching is an indispensable part of the preservation journey.
Preparing Your Okra for Freezing
Before you even think about blanching, proper preparation of your fresh okra is paramount. Start by selecting the freshest, most tender pods from your garden or farmer’s market. Look for vibrant green okra that is firm to the touch and relatively blemish-free. Younger, smaller pods tend to be less fibrous and have a milder flavor, making them ideal for freezing.
Once selected, thoroughly wash the okra under cool running water to remove any dirt or garden debris. Gently pat the pods dry with a clean cloth or paper towel. Next, trim off the very tip of the stem end, being careful not to cut into the seed cavity, as this can release the mucilage (the “slime” factor) that some find undesirable. At this stage, you can choose to freeze the pods whole or slice them into uniform pieces, typically 1/2-inch to 1-inch thick, depending on your preferred future use. Slicing before blanching often allows for more even cooking and easier packaging.
Step-by-Step Guide to Freezing Okra
Mastering the art of freezing okra is simpler than you might imagine, especially when you follow these clear, step-by-step instructions. We’ll focus on the recommended blanching method, which yields the best quality and longest-lasting frozen okra.
Method 1: The Recommended Blanching Method for Optimal Quality
- Prepare Your Okra: As mentioned above, wash your fresh okra pods thoroughly and pat them dry. Trim the stem ends and either leave the pods whole or slice them into desired sizes (typically 1/2 to 1-inch thick rounds). Ensure all pieces are relatively uniform for even blanching.
- Prepare Boiling Water and an Ice Bath: Fill a large pot with water, ensuring there’s enough room for the okra to be fully submerged. Bring the water to a rolling boil. While the water heats, prepare a large bowl filled with ice water – the colder, the better! This ice bath is critical for immediately stopping the cooking process after blanching.
- Blanch the Okra: Carefully add the prepared okra to the vigorously boiling water. Do not overcrowd the pot; blanch in small batches to ensure the water temperature doesn’t drop too significantly. Start a timer as soon as the water returns to a boil. For most okra pods, a blanching time of exactly 3 minutes is ideal.
- Immediately Chill in Ice Water: As soon as the 3 minutes are up, use a slotted spoon or spider strainer to quickly remove the blanched okra from the boiling water. Plunge it directly into the prepared ice bath. This rapid cooling is essential to prevent the okra from cooking further and to lock in its crisp texture, vibrant color, and essential nutrients. Let the okra sit in the ice water for at least 3 minutes, or until it is completely cooled through.
- Thoroughly Drain and Dry: Once chilled, remove the okra from the ice bath and place it in a colander to drain excess water. For best results, spread the okra in a single layer on clean kitchen towels or paper towels and gently blot them dry. Removing as much surface moisture as possible is crucial to prevent ice crystals from forming during freezing, which can lead to freezer burn and a loss of quality.
- Flash Freeze (Optional, but Highly Recommended): For loose, non-clumping frozen okra, consider flash freezing. Spread the thoroughly dried okra in a single layer on a baking sheet lined with parchment paper. Place the baking sheet in the freezer for 1-2 hours, or until the okra pieces are individually frozen solid. This prevents them from sticking together in the storage bag, allowing you to easily grab only the amount you need for a recipe without having to thaw an entire block.
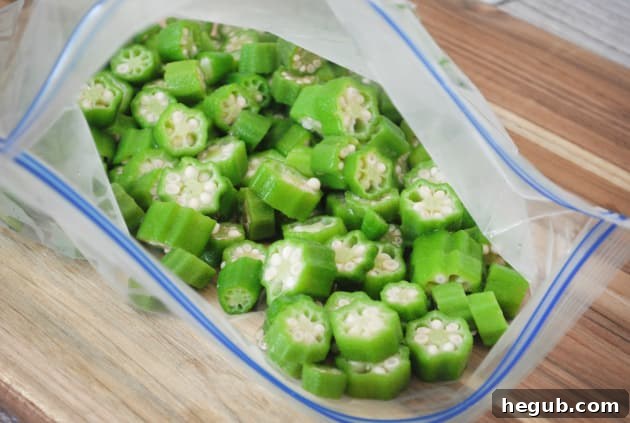
- Package and Store: Transfer the flash-frozen (or simply well-drained) okra into freezer-safe bags or airtight containers. Remove as much air as possible from the bags using a straw or a vacuum sealer to prevent freezer burn. Label the bags or containers with the date of freezing. Properly stored, blanched and frozen okra can maintain its quality for 8-12 months in a standard freezer.
Method 2: Freezing Okra Without Blanching (The “Lazy Freezer” Approach)
While blanching is highly recommended for optimal quality, some home cooks prefer a quicker, unblanched method, often referred to as the “lazy freezer” approach. This involves simply washing, drying, trimming, and slicing the okra, then placing it directly into freezer bags and freezing. This method is undeniably faster, but it comes with caveats.
Unblanched okra tends to have a shorter freezer life (typically 2-3 months), and it is more susceptible to changes in color, flavor, and texture. It may develop a somewhat “grassy” flavor or become tougher when cooked. This method is best suited if you plan to use the okra within a couple of months or if you don’t mind a slight compromise in quality for the sake of convenience. If you choose this route, ensure the okra is completely dry before freezing to minimize ice crystal formation.
Maximizing Your Frozen Okra Experience
Having a stash of frozen okra in your freezer opens up a world of culinary possibilities. It means you’re never far from adding a touch of Southern comfort or global zest to your meals, regardless of what’s in season.
How to Use Frozen Okra in Your Cooking
The beauty of properly frozen okra is its versatility. For most recipes, you can cook it directly from frozen without thawing, which helps maintain its texture and prevents it from becoming overly slimy. If a recipe calls for thawed okra, simply let it sit at room temperature for a short while or run it under cold water until pliable, but avoid fully thawing if you want to prevent an increase in mucilage.
Frozen okra shines in countless dishes. It’s a fundamental ingredient in classic Southern gumbos and stews, where it acts as a natural thickener and imparts its unique flavor. You can add it to Indian curries for a delightful texture, or roast it with other vegetables for a simple, healthy side dish. Many enjoy a taste similar to fried okra without the added calories by preparing delicious grilled okra, which often involves tossing it with olive oil and seasonings before grilling or baking until tender-crisp.
Essential Tips for Best Results
- Start with Freshness: The quality of your frozen okra directly reflects the quality of the fresh okra you begin with. Always use young, tender, and unblemished pods for the best results.
- Remove Air from Packaging: Air is the enemy of frozen food, leading to freezer burn. Use vacuum sealer bags or squeeze out as much air as possible from freezer bags before sealing them tightly.
- Label Clearly: Always label your frozen okra with the date it was processed. This helps you rotate your stock and ensures you use the older batches first, maintaining optimal quality.
- Don’t Overcrowd the Pot: When blanching, work in small batches to ensure the water temperature remains consistently high, allowing for even and efficient blanching.
- Ensure Thorough Drying: Excess moisture can lead to ice crystals and freezer burn. Take the extra time to pat your blanched okra completely dry before packaging.
Common Freezing Mistakes to Avoid
To ensure your frozen okra is always top-notch, be mindful of these common pitfalls:
- Under-blanching or Over-blanching: Too little blanching won’t deactivate enzymes effectively, while too much can cook the okra and make it mushy. Stick to the 3-minute guideline.
- Not Cooling Quickly Enough: Failing to plunge blanched okra into an ice bath immediately can lead to continued cooking, resulting in soft or discolored pods.
- Poor Packaging: Using non-freezer-safe bags or failing to remove air can lead to freezer burn, which compromises flavor and texture.
- Freezing Old or Damaged Okra: Freezing won’t improve the quality of subpar okra. Always use the best pods available.
Conclusion: Embrace Year-Round Okra Enjoyment
Freezing okra is a simple, effective, and rewarding way to extend your harvest and enjoy the unique taste of this versatile vegetable throughout the year. By following these blanching and freezing techniques, you can ensure that every pod retains its vibrant color, satisfying texture, and delicious flavor. Whether you’re planning a hearty gumbo for a winter evening or a light grilled side dish in the spring, your freezer will be stocked with garden-fresh goodness. So, next time your okra plants are overflowing, embrace the art of preservation and savor the taste of your garden year-round. For more inspiration and diverse okra recipes, be sure to visit Food Fanatic.