
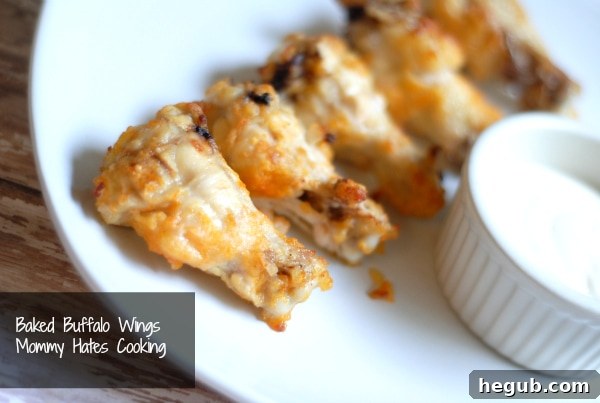
Mastering Homemade Buffalo Wings: Your Ultimate Guide to Crispy, Tangy Perfection
Few dishes evoke the same sense of excitement and satisfaction as a perfectly crafted batch of buffalo wings. These iconic chicken pieces, renowned for their crispy exterior, succulent meat, and signature spicy-tangy sauce, are a staple at sporting events, casual get-togethers, and anytime a craving for something truly delicious strikes. While many are content to order them from a restaurant, learning to make homemade buffalo wings is a rewarding culinary adventure that allows for ultimate customization and a freshness that takeout simply can’t match.
For my husband, buffalo wings rank high on his list of all-time favorite foods. The joy of presenting him with a freshly prepared batch is always a highlight, though it often comes with a request for “about 20 more” after the first plate quickly vanishes! This recipe aims to deliver that same irresistible appeal, allowing you to control the heat, crispiness, and overall flavor profile to create your ideal wing experience.
The Storied Origin of a Culinary Icon
To truly appreciate the buffalo wing, it’s worth a brief journey back to its roots. The legend begins in 1964, at the Anchor Bar in Buffalo, New York. Co-owner Teressa Bellissimo is credited with inventing the dish when her son and his friends arrived hungry late one night. With few other options available, she improvisationally deep-fried chicken wings, tossed them in a simple but potent hot sauce, and served them with blue cheese dressing and celery sticks. The spontaneous creation was an immediate sensation, transforming an often-discarded part of the chicken into a global culinary phenomenon. From that moment, the buffalo wing secured its place as an American classic, a testament to culinary innovation born out of necessity.
Why Homemade Buffalo Wings Are Always the Best Choice
While the convenience of store-bought or restaurant wings is tempting, the advantages of making them at home are significant. Firstly, you gain complete command over the ingredients. This means selecting the freshest chicken, using high-quality butter, and choosing your preferred brand of hot sauce. More importantly, homemade wings empower you to fine-tune the spice level. If you, like my husband, prefer a milder kick that’s more flavorful than fiery, you can easily adjust the cayenne pepper and chili powder. Conversely, if your palate demands a blazing inferno, increasing the quantities of these spices and perhaps adding a dash of extra-hot sauce will leave your mouth burning in the best possible way!
Beyond taste, there’s a substantial economic benefit. Preparing a large batch of wings at home is often far more cost-effective than purchasing the same quantity from a commercial establishment. This makes them an ideal choice for feeding a crowd during football season, holiday parties, or any large gathering where delicious, satisfying appetizers are a must. The sense of accomplishment that comes from serving a homemade dish, especially one as universally adored as buffalo wings, is an added bonus that elevates the entire dining experience.
The Quest for Crispy: Achieving the Perfect Texture
The hallmark of an exceptional buffalo wing is its unparalleled texture: a shatteringly crispy skin encasing tender, juicy meat. While deep-frying is the traditional method to achieve this crispiness, our recipe focuses on a baked approach that delivers equally impressive results without the mess and added fat of deep-frying. This method is not only healthier but also much simpler for the home cook.
The secret to achieving baked crispiness begins even before cooking. Thoroughly drying your chicken wings with paper towels is an absolutely critical step. Excess moisture on the skin will cause the wings to steam rather than crisp, resulting in a disappointing, soggy texture. Once dried, a light dredge in a seasoned flour mixture creates a thin, crunchy coating that becomes wonderfully golden in the oven. An often-overlooked but vital tip is to refrigerate the floured wings for 30 minutes to an hour. This crucial chilling period allows the flour to adhere firmly to the skin and further dries out the surface, setting the stage for maximum crispness. Finally, baking the wings on a wire rack set over a baking sheet ensures that hot air circulates evenly around all surfaces of each wing, promoting uniform cooking and an all-around crispy finish.
Crafting the Classic Buffalo Sauce: A Symphony of Flavors
The distinctive flavor of buffalo wings comes from their iconic sauce, a deceptively simple yet incredibly flavorful concoction. The traditional sauce primarily consists of just two ingredients: melted butter and hot pepper sauce. Frank’s RedHot is widely considered the original and remains a gold standard for its balanced heat and tangy notes. The butter plays a crucial role, mellowing the intensity of the hot sauce while adding a rich, smooth texture that coats the crispy wings beautifully.
Our recipe elevates this classic base with a thoughtful blend of spices. Cayenne pepper and chili powder contribute additional layers of warmth and a nuanced heat that goes beyond just the hot sauce. Garlic powder and onion powder introduce aromatic depth, while seasoned salt ties all the flavors together, enhancing the savory notes of the chicken. This combination ensures a well-rounded flavor profile that is both complex and incredibly satisfying. Don’t hesitate to experiment with different brands of hot sauce or add a touch of honey for a sweet-spicy variation, or even a splash of apple cider vinegar for an extra tang. The beauty of homemade is your ability to tailor it precisely to your preference.
Essential Tools and Foolproof Preparation Tips
Ensuring a smooth and successful buffalo wing creation hinges on having the right tools and following key preparation steps:
- Mixing Bowls: You’ll need at least two large mixing bowls – one for the seasoned flour and another for tossing the wings in the buffalo sauce.
- Paper Towels: Abundant paper towels are essential for drying the chicken wings thoroughly.
- Baking Sheet and Wire Rack: A large, rimmed baking sheet lined with foil or parchment for easy cleanup, topped with an oven-safe wire rack, is critical for achieving crispy baked wings.
- Tongs: Heat-resistant tongs will be your best friend for flipping wings and tossing them in sauce.
- Oven Thermometer: An inexpensive oven thermometer can help ensure your oven is preheating to the exact temperature, preventing under or over-baking.
Regarding preparation, always ensure your chicken wings are fully thawed before beginning. If frozen, plan ahead to allow them to defrost safely in the refrigerator. Remember, the drying and chilling steps are not optional; they are paramount to achieving that coveted restaurant-quality crispness. Take your time with these initial steps, and your patience will be rewarded with superior results.
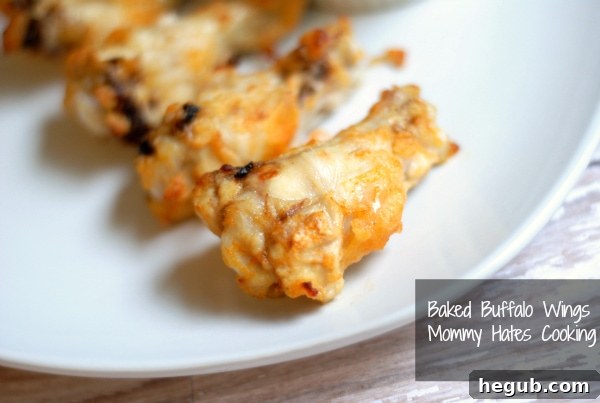
Classic Baked Buffalo Wings
Save RecipeSaved!
Ingredients
- 24 Chicken Wings Thawed, whole or split into drumettes and flats
- 1 Cup All-Purpose Flour or Gluten-Free All-Purpose Flour Blend for a GF option
- 1/2 Tsp Cayenne Pepper adjust to desired heat level
- 1/2 Tsp Chili Powder for depth of flavor
- 1/2 Tsp Garlic Powder
- 1/2 Tsp Onion Powder
- 1/2 Tsp Seasoned Salt or salt and pepper to taste
- 1/2 Cup Unsalted Butter Melted, essential for richness and flavor
- 1/2 Cup Hot Pepper Sauce such as Frank’s RedHot, the classic choice
Instructions
-
Prepare the Seasoned Flour: In a medium bowl, combine the all-purpose flour, cayenne pepper, chili powder, garlic powder, onion powder, and seasoned salt. Whisk them together until well blended. Remember, this recipe is incredibly adaptable, so feel free to add more spice (like extra cayenne or a pinch of ghost pepper powder) or your favorite herbs.
-
Dry the Chicken Wings: This is a crucial step for achieving crispy wings! Thoroughly pat each chicken wing dry with paper towels. Remove as much moisture as possible from the skin. If the wings are wet, they will steam rather than crisp up in the oven, leading to a soggy texture.
-
Coat the Wings: Dip each dry wing into the seasoned flour mixture, ensuring it is thoroughly coated on all sides. Lightly shake off any excess flour. Place the coated wings on a clean plate or baking sheet.
-
Chill for Crispiness: Transfer the plate of coated wings to the refrigerator and chill for at least 30 minutes, or up to 1 hour. This chilling period helps the flour coating adhere firmly to the chicken and further dries out the skin, which is essential for that perfect crispy texture.
-
Preheat Oven & Prepare Baking Sheet: While the wings are chilling, preheat your oven to 400°F (200°C). Line a large baking sheet with foil or parchment paper for easy cleanup, then place a wire rack on top. This setup allows air to circulate around the wings, ensuring even cooking and crispiness.
-
Prepare the Buffalo Sauce: In a separate bowl, melt the butter. Once melted, stir in the hot pepper sauce until well combined. This forms your classic buffalo sauce base.
-
Sauce the Wings: Remove the chilled wings from the refrigerator. Dip each coated wing into the prepared buffalo sauce, ensuring it’s generously covered. Place the sauced wings in a single layer on the wire rack on your prepared baking sheet.
-
Bake to Perfection: Bake the wings in the preheated oven for 25 minutes. After 25 minutes, carefully flip each wing over to ensure even crisping. Bake for an additional 25 minutes, or until the wings are golden brown, crispy, and cooked through to an internal temperature of 165°F (74°C). The total baking time may vary slightly depending on your oven and wing size.
-
Serve Immediately: Remove the wings from the oven and serve hot with your favorite accompaniments like blue cheese or ranch dressing and celery sticks. Enjoy your perfectly crispy, tangy, and spicy homemade buffalo wings!
Nutrition
Did You Make These Incredible Buffalo Wings?
We absolutely love seeing your culinary creations! If you whipped up a batch of these classic baked buffalo wings, don’t forget to share your photos with us. Tag #mommyhatescooking on Instagram, and make sure to follow for more delicious recipes and cooking inspiration @momhatescooking. Your feedback and shares truly make our day!
Pin Recipe
Share on Facebook
Perfect Pairings and Creative Customization Ideas
A plate of buffalo wings, while magnificent on its own, is truly complete with the right accompaniments. The traditional choices are cool and creamy blue cheese dressing and crisp celery sticks. The refreshing crunch of celery and the pungent, cooling notes of blue cheese offer a perfect counterpoint to the spicy, rich wings. Ranch dressing can also be offered as a milder alternative. For an added touch, consider serving carrot sticks or a light coleslaw to further balance the heat and richness.
The beauty of homemade wings extends to endless customization of the sauce. Here are a few ideas to inspire your culinary creativity:
- Sweet & Spicy: Introduce a tablespoon or two of honey, maple syrup, or brown sugar to the melted butter and hot sauce mixture for a delicious sweet-heat glaze.
- Garlic Infusion: For garlic lovers, increase the garlic powder in the flour mixture, or sauté a teaspoon of minced fresh garlic in the butter before combining it with the hot sauce.
- Smoky Undertones: A dash of liquid smoke or smoked paprika added to either the flour blend or the sauce can provide a wonderful depth of smoky flavor.
- Zesty Lemon Pepper: Incorporate lemon pepper seasoning into your dry flour mix for a vibrant, zesty twist that pairs surprisingly well with the classic buffalo flavor.
- Milder Heat: If you prefer a less intense experience, reduce or omit the cayenne pepper and chili powder from the flour, and use a milder hot sauce.
- Extreme Heat: For those who dare, double the cayenne, add a pinch of ghost pepper flakes, or seek out an extra-hot brand of pepper sauce. Always proceed with caution and taste as you go!
Troubleshooting Common Buffalo Wing Challenges
Even seasoned cooks can encounter small hiccups when making wings. Here are solutions to common issues:
- Soggy Wings: This is the most frequent complaint. The primary culprits are insufficient drying of the wings and skipping the refrigeration step. Also, avoid overcrowding your baking sheet; if necessary, bake in batches to ensure proper air circulation around each wing.
- Uneven Cooking/Browning: Flipping the wings halfway through the baking process is crucial for ensuring all sides cook and crisp up evenly. Using a wire rack is also key for this.
- Sauce Not Adhering Well: The wings should be hot when you toss them in the sauce. The heat helps the sauce melt and cling better. If you’ve baked wings ahead of time, briefly reheat them before saucing.
- Not Crispy Enough: Double-check your oven temperature with an oven thermometer, as ovens can sometimes be inaccurate. If the wings still lack crispiness after the recommended baking time, you can extend the cooking by a few minutes or increase the temperature slightly (e.g., to 425°F/220°C) for the last 5-10 minutes, but monitor them closely to prevent burning.
Conclusion: Your New Favorite Game Day Hero
Armed with this comprehensive guide and recipe, you are now ready to conquer the art of homemade buffalo wings. Forget the often-disappointing takeout versions; you can now create a batch of perfectly crispy, tangy, and spiced chicken wings that are guaranteed to be a crowd-pleaser. Whether for a football watch party, a festive gathering, or simply a satisfying weeknight treat, these wings are not just a dish; they’re an experience. Simple to prepare, incredibly flavorful, and endlessly customizable, they are destined to become your new go-to recipe. So, gather your ingredients, fire up your oven, and prepare to delight your taste buds with the best homemade buffalo wings you’ve ever had!
Have you visited our Products list? Be sure and check out Mommy Hates Cooking Products and Services.
Need more recipe ideas? Check out the Recipe Index by Mommy Hates Cooking.