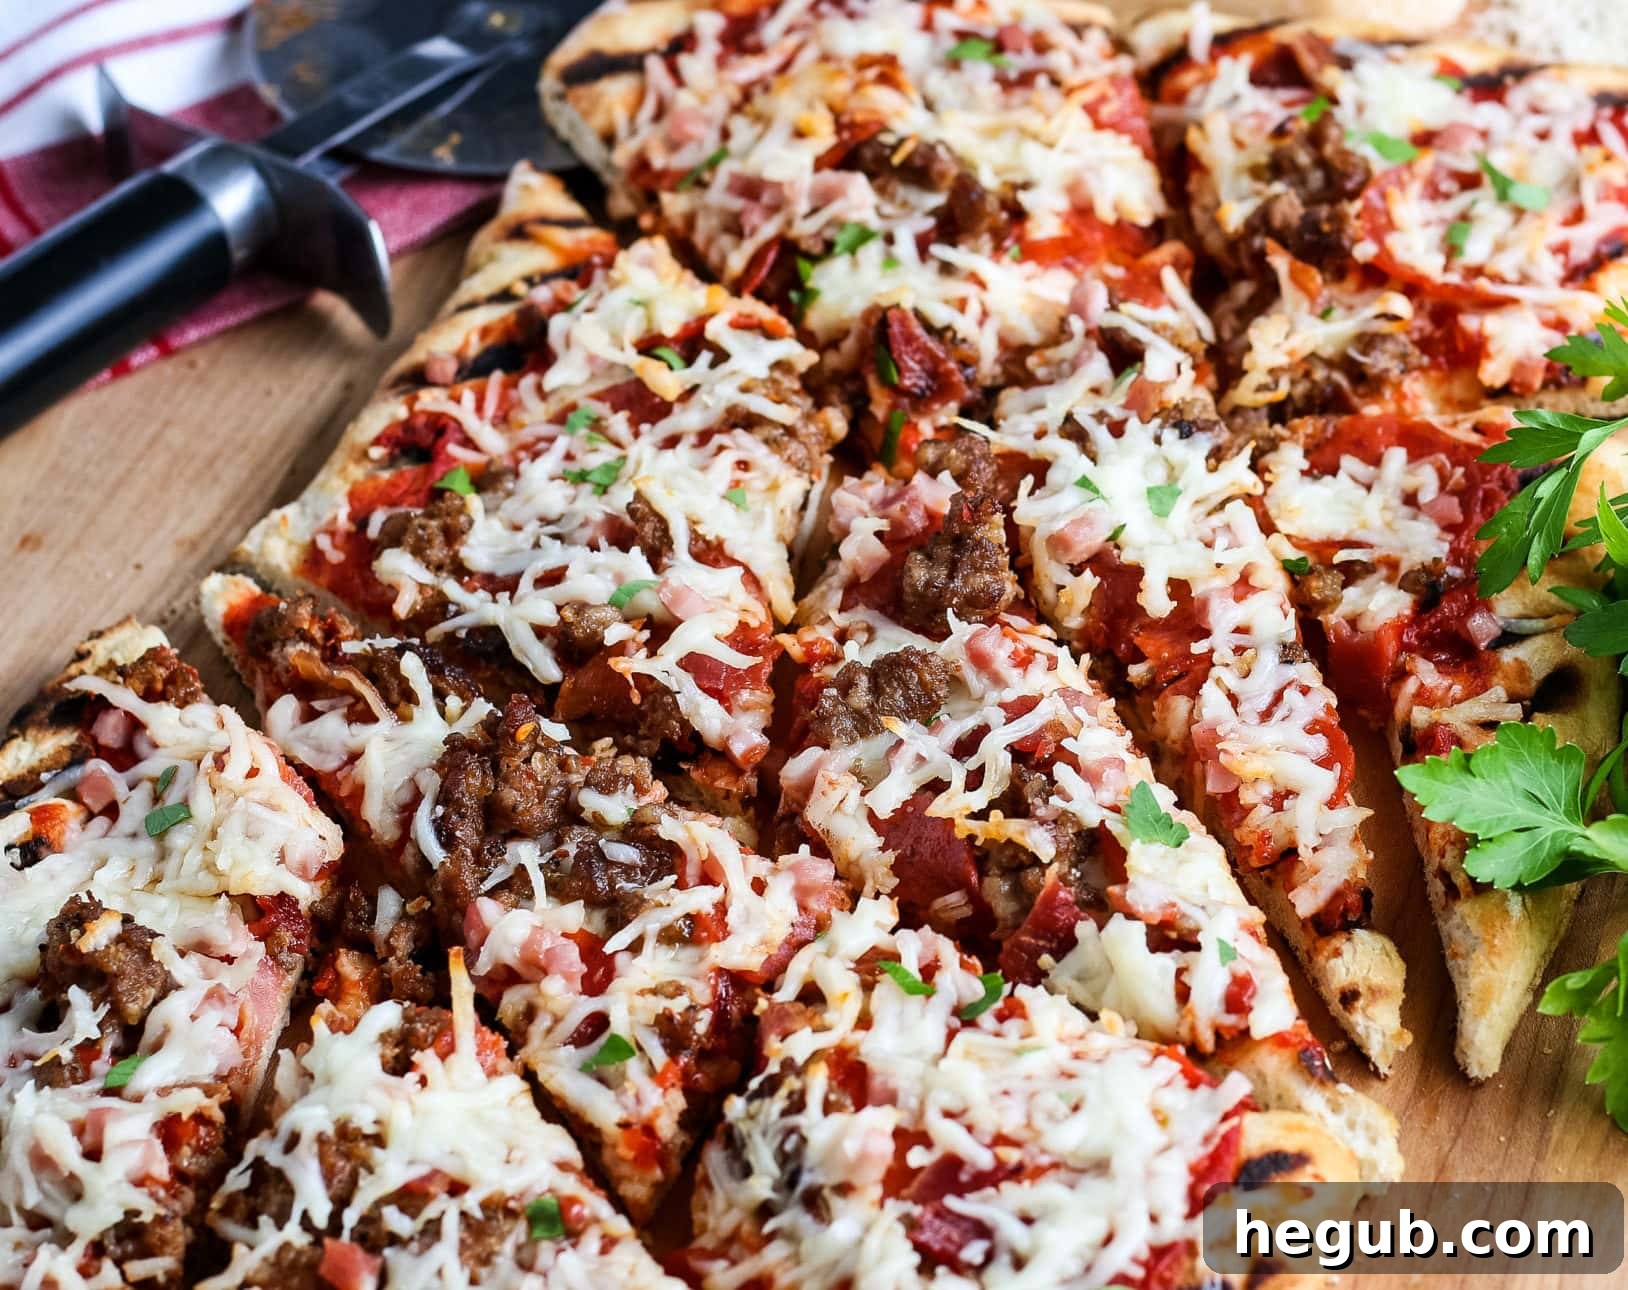
Mastering Grilled Pizza: Your Ultimate Guide to a Perfect Outdoor Pie (Gluten-Free Options Included!)
There’s something uniquely satisfying about grilled pizza. Far beyond the conventional oven-baked variety, cooking pizza on your backyard grill infuses it with an irresistible smoky flavor and creates a delightfully crispy crust that’s truly unmatched. If you’ve never tried it, prepare for a culinary revelation! Grilling pizza is not only surprisingly easy but also transforms a classic weeknight meal into an exciting outdoor cooking adventure. It’s perfect for warmer months when heating up the kitchen with a hot oven is the last thing you want to do.
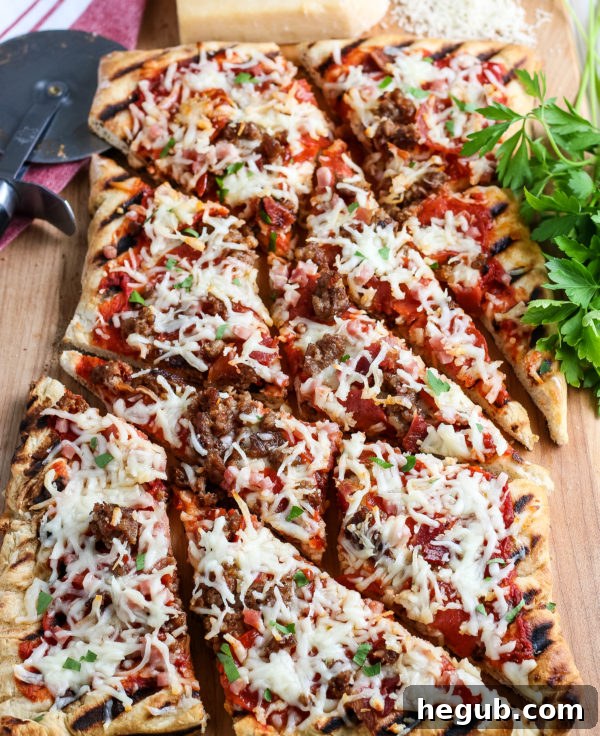
Imagine gathering your family and friends for a fun-filled pizza night where everyone gets to customize their own personal grilled masterpiece. The entire process, from preparing the dough to adding your favorite toppings, becomes a hands-on, interactive experience. And the best part? It’s incredibly versatile. Whether you prefer a traditional crust or need a delicious gluten-free option, grilled pizza delivers every time. Get ready to elevate your pizza game and discover why this method is quickly becoming a favorite for pizza lovers everywhere. This comprehensive guide will walk you through every step, ensuring your grilled pizza is nothing short of perfection.
Why Grilled Pizza is a Game Changer for Your Outdoor Cooking
Cooking pizza on the grill isn’t just an alternative; it’s a superior method for several compelling reasons. The intense, direct heat of a grill cooks the pizza incredibly fast, typically in just minutes, which is faster than most home ovens can achieve with a crispy crust. This rapid cooking sets the stage for a beautifully charred, chewy interior and an unbelievably crisp exterior that mimics the results of a professional brick oven. The high temperature ensures the dough cooks through quickly before the toppings can get overdone, resulting in a balanced texture throughout the pizza.
Beyond the texture, the flavor profile is profoundly enhanced. The open flame imparts a subtle, smoky char to the crust, adding a depth of flavor that’s impossible to replicate indoors. This characteristic smokiness pairs wonderfully with classic pizza ingredients, creating a taste sensation that will have you coming back for more. Furthermore, it allows you to enjoy the process of cooking outdoors, keeping your kitchen cool during hot summer evenings. It transforms a simple meal into an interactive and engaging activity, making it a fantastic choice for family gatherings, parties with friends, or simply a relaxed Friday night dinner. The novelty and delicious outcome make grilled pizza a guaranteed crowd-pleaser.
Choosing Your Pizza Dough: Regular or Gluten-Free for Grilling Success
The foundation of any great pizza, especially grilled pizza, is the dough. Your choice of dough will significantly impact the final texture and flavor. Luckily, you have several excellent options, whether you’re working with conventional ingredients or need a gluten-free alternative. The key is to select a dough that can withstand the grill’s heat and offer a good base for your toppings.
Homemade vs. Store-Bought Dough
- Homemade Dough: Crafting your own dough offers ultimate control over ingredients and texture. You can adjust the hydration for a chewier crust, incorporate fresh herbs, or even experiment with different flours for unique flavors. Many home cooks find the process rewarding, and fresh dough often yields the best results in terms of flavor and elasticity. For a reliable recipe, an easy homemade pizza dough is a great starting point, adaptable for both regular and gluten-free flour.
- Store-Bought Dough: For unparalleled convenience, pre-made pizza dough is a fantastic option. You can find it in the refrigerated section of most grocery stores, often alongside other bread products. It saves significant time and effort, making grilled pizza accessible even on busy weeknights. When using store-bought dough, always make sure to bring it to room temperature (about 30-60 minutes) before rolling it out. This makes it much more pliable and easier to work with, preventing it from snapping back or tearing.
Can You Make Gluten-Free Grilled Pizza? Absolutely!
Yes, gluten-free grilled pizza is not only possible but can be absolutely delicious! The key is selecting the right gluten-free crust. Traditional gluten-free doughs can sometimes be trickier to handle due to the absence of gluten, which provides elasticity and structure. However, the market now offers many excellent recipes and store-bought options that perform beautifully on the grill.
When making gluten-free dough from scratch, we highly recommend using a dedicated gluten-free pizza crust recipe formulated for ease of handling and good texture. For example, a “delivery-style” gluten-free crust like this Gluten-Free Delivery Style Pizza Crust is a fantastic choice, known for its excellent texture and flavor that stands up well to grilling. If you’re adapting a regular pizza dough recipe, simply swap the traditional wheat flour with a high-quality gluten-free all-purpose flour blend. Be mindful that gluten-free dough might be stickier and less pliable; therefore, extra flour for dusting and a light hand during rolling are often required. It may also cook slightly differently, so keep a closer eye on it during the grilling process.
Essential Equipment for Grilled Pizza Success
To ensure a smooth and enjoyable grilled pizza experience, having the right tools on hand can make all the difference. While you don’t need a full arsenal of specialized gadgets, a few key items will simplify the process and improve your results, making you feel like a true outdoor pizza chef:
- Your Grill: The star of the show! Both gas and charcoal grills work wonderfully.
- Gas Grills: Offer precise temperature control and quick heating, making them convenient for weeknight grilling. You can easily adjust zones for direct and indirect heat.
- Charcoal Grills: Impart an even deeper, more authentic smoky flavor, which many consider a hallmark of great grilled pizza. However, they require a bit more attention to heat management and temperature consistency.
- Large Baking Sheet or Pizza Peel: This is absolutely essential for safely transporting the raw, floppy dough to and from the hot grill grates. A pizza peel with a lightly floured surface is ideal, as its thin edge allows for easy sliding. If you don’t have a pizza peel, a sturdy, flat baking sheet with no rim can also work effectively.
- Long-Handled Tongs or Spatula: These are crucial for safely flipping the dough and carefully adjusting the pizza on the grill without burning your hands. Look for tools designed for grilling that can withstand high temperatures.
- Vegetable Oil and Paper Towels: For thoroughly oiling the grill grates to create a non-stick surface. Choose a high-smoke-point oil like vegetable, canola, or grapeseed oil.
- Pizza Cutter: For easy and clean slicing once your grilled masterpiece is ready. A sharp, wheeled cutter makes quick work of hot, crispy crusts.
- Cutting Board: A large, clean surface for serving and slicing your pizza once it comes off the grill. This protects your countertops and provides a stable surface.
- Bowls for Toppings: Have all your sauces, cheeses, and toppings prepped and organized in separate bowls near the grill for quick assembly.
Preparing Your Grill and Dough for Perfection
Proper preparation is paramount for achieving a fantastic grilled pizza. A little effort upfront ensures a smooth cooking process, prevents common mishaps, and ultimately leads to a delicious outcome that will impress anyone. Don’t skip these crucial steps!
Grill Preparation: The Non-Stick Secret
First and foremost, clean your grill grates thoroughly. Any old food residue or charred bits can cause your delicate pizza dough to stick and tear, ruining your hard work. Use a stiff wire brush to scrape off any debris from previous cooks. Once clean, the next critical step is oiling. Choose a high-smoke-point oil like vegetable, canola, or grapeseed oil. Fold a paper towel into a thick pad, dip it in the oil, and using your long-handled tongs, carefully rub it over the hot grill grates. Repeat this process a couple of times until the grates have a visible sheen of oil. This step is absolutely crucial, as it creates a non-stick surface that allows the dough to release easily, ensuring a perfect flip without any sticking issues.
Dough Rolling: Thin and Even is Key
Once your chosen pizza dough (homemade or store-bought) has come to room temperature and is relaxed, it’s time to roll it out. Lightly flour your work surface and your rolling pin to prevent sticking. Roll the dough into a thin rectangle or circle, aiming for an even thickness of about 1/8 to 1/4 inch. Thinness is important because it allows the dough to cook quickly and become wonderfully crispy without burning the outside while the inside remains raw. If the dough springs back, let it rest for a few minutes before continuing to roll. Once rolled, carefully transfer the dough to a lightly floured large baking sheet or pizza peel. This makes it easy to slide the dough onto the hot grill without it losing its shape or tearing.
Pre-Cooking Toppings: A Smart Move for Best Results
While some toppings can cook directly on the pizza, others benefit significantly from pre-cooking. Ingredients like raw sausage, bacon, or thicker, denser vegetables (e.g., bell peppers, onions, mushrooms) should be cooked or lightly sautéed beforehand. This serves a few important purposes: it ensures they are fully cooked and tender by the time your rapidly-grilling pizza is done, and it prevents them from releasing too much moisture onto the crust, which can make it soggy. For example, drain any excess fat from cooked meats, and lightly sauté mushrooms to release their water. Prepare all your toppings and have them ready in bowls right next to your grill for quick assembly.
The Art of Grilling Pizza: A Step-by-Step Guide
Grilling pizza is a rapid process, so it’s essential to have all your ingredients, tools, and a clear workspace ready before you begin. This allows for quick assembly and minimizes the risk of burning, ensuring you can enjoy the moment and the delicious results.
Step 1: Preheat the Grill to the Perfect Temperature
This is arguably the most important step for grilled pizza success. You need high heat to achieve that coveted crispy, slightly charred crust. Aim for at least 500 degrees Fahrenheit (260°C), or a strong medium-high heat. Let your grill preheat for 10-15 minutes to ensure the grates are uniformly hot and the entire cooking chamber is up to temperature. This intense heat is what creates that desirable quick-cooking, crispy crust and prevents the dough from becoming dense or soggy.
Step 2: Grill the First Side of the Dough
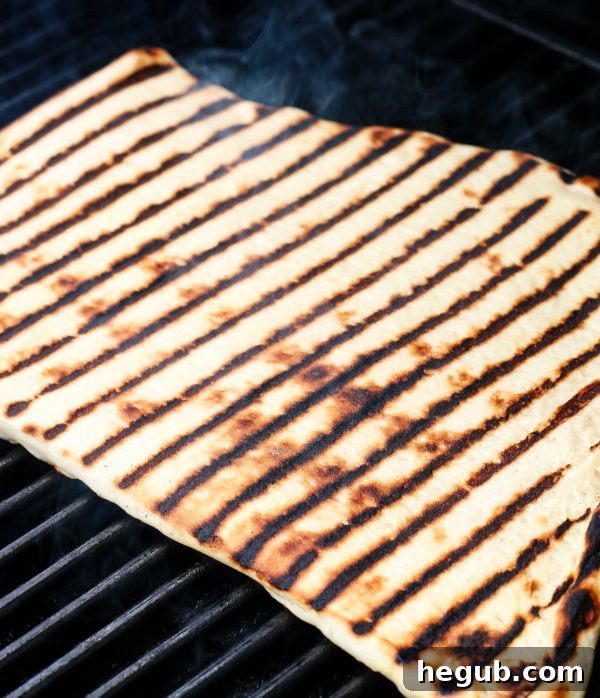
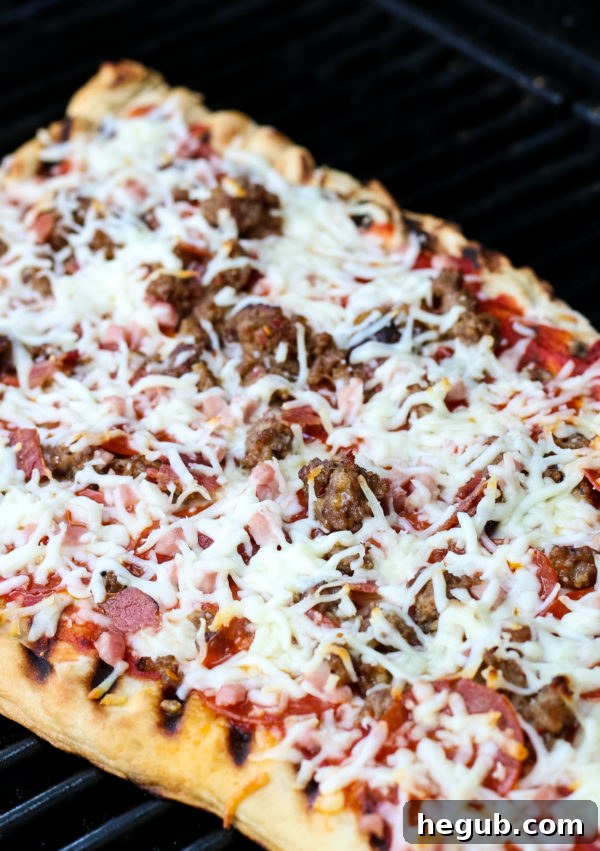
With your grill fully preheated and grates well-oiled, carefully slide the rolled-out pizza dough from your baking sheet or pizza peel directly onto the hot grill grates. Be confident and swift in this motion. Close the lid (if your grill has one) to trap heat, and cook for approximately 2-3 minutes. Keep a close eye on it! You’re looking for the bottom to become lightly browned with visible grill marks and for the dough to puff up slightly, indicating that it’s cooking. The dough should also be firm enough to handle without tearing when you attempt to flip it.
Step 3: Flip, Oil, and Top Quickly
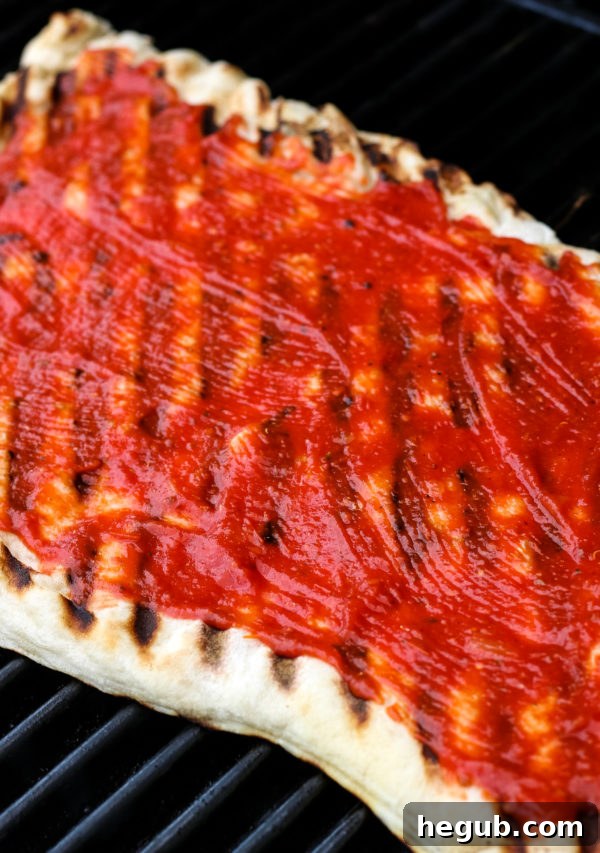
Using your long-handled tongs or a large spatula, carefully and confidently flip the partially cooked pizza dough over. The side that was just on the grill will now be facing up, and it will be firm and slightly blistered. Lightly brush this cooked side with a little extra virgin olive oil – this adds a rich flavor, helps prevent the crust from becoming too dry, and provides a barrier for the sauce. Immediately, spread your pizza sauce, sprinkle with an even layer of cheese, and add your prepared toppings. Work quickly and efficiently in this step to prevent the crust on the bottom from overcooking or burning.
Step 4: Finish Grilling with Toppings
Once topped, close the grill lid again. Continue to grill for an additional 2-3 minutes. The closed lid helps to circulate the heat, melting the cheese evenly and ensuring the toppings are heated through and lightly cooked without burning the crust. Again, monitor closely. The pizza is ready when the cheese is beautifully melted and bubbly, the sauce is warm, and the toppings appear cooked through and slightly browned. For an even crispier bottom or if your grill has uneven heat, you can rotate the pizza or move it to a slightly cooler part of the grill for an extra minute or two if needed. Don’t overcook, as grilled pizza cooks very fast!
Unleashing Your Creativity: Toppings and Sauce Ideas
The beauty of pizza, especially grilled pizza, lies in its infinite topping possibilities. This is where you can truly make it your own and let your culinary imagination run wild! Don’t be afraid to experiment with different combinations to find your perfect pie.
Sauce Selection
Whether you choose store-bought or homemade, the sauce sets the tone for your pizza. Classic marinara is always a winner, but consider exploring other delicious options to add variety:
- Homemade Pizza Sauce: For a fresh and vibrant flavor that truly shines, try making your own! This Homemade Pizza Sauce recipe is excellent and allows you to control the seasoning.
- Pesto: A bright, herbaceous alternative made from basil, pine nuts, garlic, Parmesan, and olive oil. It pairs beautifully with chicken, fresh tomatoes, or artichoke hearts.
- White Sauce (Alfredo or Garlic Oil): Creates a rich, creamy base perfect for gourmet pizzas. An Alfredo sauce or simply a drizzle of garlic-infused olive oil with fresh herbs can be a fantastic foundation for mushrooms, spinach, or roasted garlic.
- BBQ Sauce: For a tangy, smoky BBQ chicken pizza. Use your favorite barbecue sauce as the base, topped with cooked chicken, red onion, and cilantro.
Cheese Choices
While shredded mozzarella is the classic choice for its incredible melt and stretch, don’t limit yourself to just one type of cheese:
- Fresh Mozzarella: Offers a creamier, softer texture and pockets of rich milky flavor. Tear it into pieces rather than shredding.
- Provolone: Adds a sharper, saltier kick and a great melt.
- Parmesan or Pecorino Romano: Excellent for grating and sprinkling on top after grilling for an extra burst of salty, umami flavor.
- Feta or Goat Cheese: For a tangy, Mediterranean or rustic twist, crumble these over your pizza. They add a wonderful piquant flavor.
- Smoked Gouda: For an even deeper smoky note, a little shredded smoked Gouda can be a game-changer.
Endless Topping Possibilities
Here are some of our favorite grilled pizza toppings, but feel free to mix and match to create your perfect pie. Remember to pre-cook any raw meats or dense vegetables as discussed earlier:
- Shredded Mozzarella Cheese (the ultimate melter!)
- Pepperoni (classic and always a hit)
- Cooked Ground Italian Sausage (ensure it’s pre-cooked and thoroughly drained of grease)
- Fresh Basil (add after grilling for the best vibrant flavor and color)
- Dried Oregano (adds a traditional Italian touch)
- Sliced Tomatoes (fresh, juicy, and vibrant)
- Mushrooms (sautéed beforehand to remove excess moisture and enhance flavor)
- Cooked Chicken (shredded or diced, perfect for BBQ or white sauce pizzas)
- Black Olives or Kalamata Olives (for a briny burst)
- Green Peppers (thinly sliced or pre-sautéed for tenderness)
- Red Onion (thinly sliced for a sharp bite)
- Pineapple (for those who love the sweet and savory combination!)
- Spinach (wilted before adding to prevent excessive moisture release)
- Artichoke Hearts (chopped or quartered, offer a tender, earthy flavor)
- Jalapeños (freshly sliced for heat or pickled for tang)
- Sun-Dried Tomatoes (packed with intense flavor)
- Anchovies (for the adventurous, a salty umami kick)
A crucial tip: remember not to overload your pizza with too many toppings. This can lead to a soggy crust and prevent even cooking. Less is often more with grilled pizza, allowing each ingredient to shine and the crust to achieve its ideal crispness.
Troubleshooting Common Grilled Pizza Problems
Even seasoned grillers can encounter minor hiccups when making grilled pizza. Don’t worry, most common problems are easily addressed with a few simple adjustments. Here’s how to troubleshoot and ensure your next grilled pizza is a smashing success:
- Dough Sticking to the Grill: This is one of the most common complaints and is almost always due to insufficient oiling of the grates or not preheating the grill enough. Ensure your grates are impeccably clean before you start, and liberally apply a high-smoke-point oil. A well-preheated, hot grill also helps the dough release more easily as it cooks quickly. If it sticks, try sliding a thin metal spatula underneath to gently lift it.
- Crust Burning Before Toppings Cook: If the bottom crust is charring too quickly, your grill might be too hot, or you’re cooking it too long on direct heat. After the first flip, if your grill has multiple burners, try moving the pizza to a slightly cooler, indirect heat zone (a burner turned off or on low) for the second phase of cooking with toppings. Alternatively, reduce the overall grill temperature slightly for the second phase. A slightly thicker dough can also help prevent this, but be careful not to make it too thick.
- Toppings Not Cooking or Cheese Not Melting: This usually indicates that the grill isn’t hot enough, or the lid wasn’t closed long enough. Ensure your grill reaches at least 500°F (260°C) during preheating. Closing the lid is crucial as it creates a convection effect, trapping heat and melting the cheese and cooking toppings more effectively. If your grill struggles to maintain high heat, consider investing in a pizza stone to place on the grates, although it somewhat defeats the direct grill effect.
- Soggy Crust: Too much sauce or watery toppings can lead to a soggy crust. Be moderate with your sauce application; a thin, even layer is usually sufficient. Also, pre-cook any high-moisture vegetables like mushrooms, spinach, or onions to draw out excess water before adding them to the pizza. Blotting fresh mozzarella can also help reduce moisture.
- Dough is Hard to Handle/Tears Easily: If your dough is cold, it will be less elastic and prone to tearing. Always bring dough to room temperature before rolling. If it’s very sticky, use a bit more flour for dusting, or lightly oil your hands and rolling pin. Gluten-free dough can be more delicate, so extra care is needed.
Serving Your Grilled Pizza Masterpiece
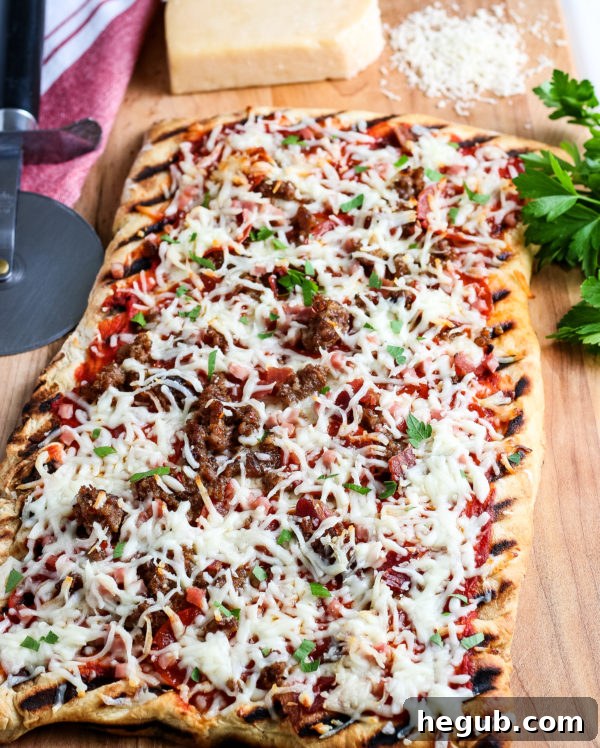
Once your grilled pizza is perfectly cooked with melted, bubbly cheese, delicious aromas, and tender toppings, it’s time for the final, satisfying step! Carefully remove it from the grill using your pizza peel or a sturdy baking sheet. Transfer it to a large, clean cutting board. Allow the pizza to rest for a minute or two – this crucial step helps the cheese set slightly and prevents the toppings from sliding off when you cut it. It also allows the crust to firm up just a touch more, enhancing its crispiness.
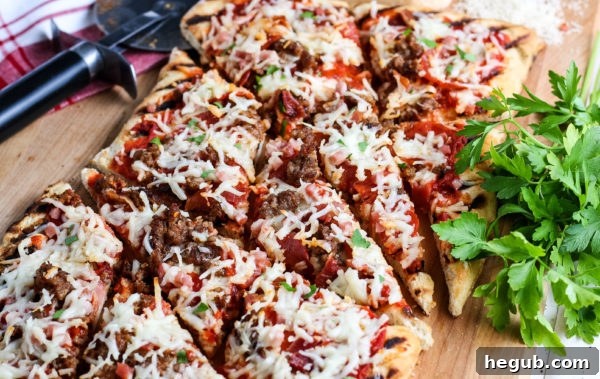
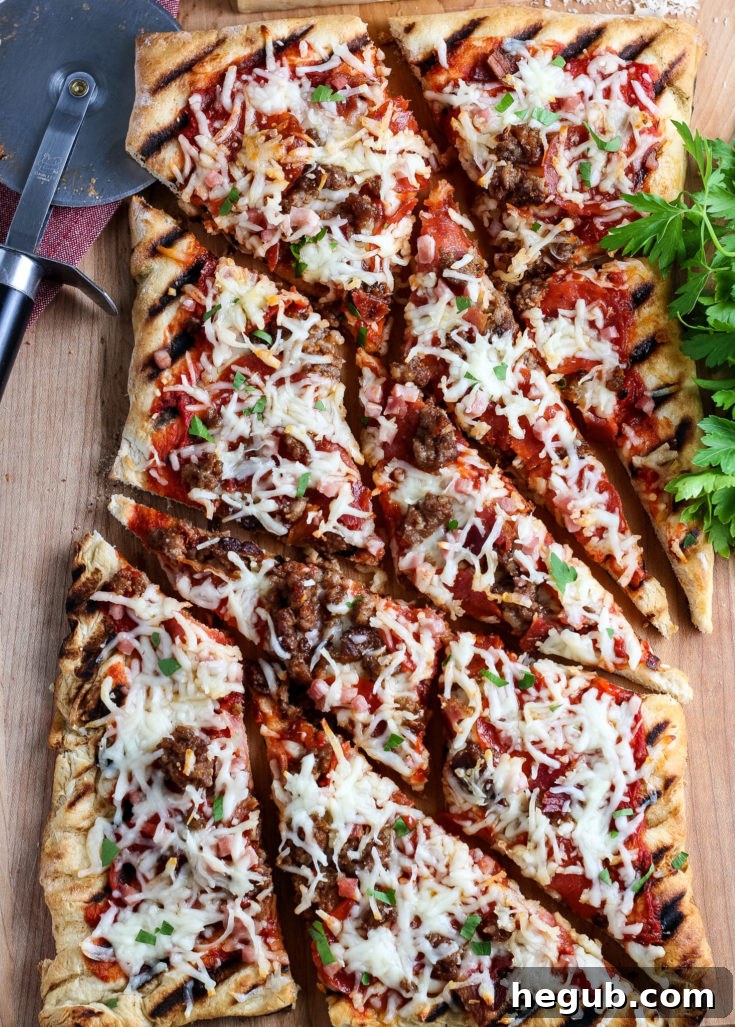
For an extra touch of freshness and flavor, consider sprinkling your pizza with fresh herbs like finely chopped basil, oregano, or parsley. A dusting of freshly grated Parmesan or Pecorino Romano cheese can also add a wonderful savory depth. Then, using your sharp pizza cutter, slice your masterpiece into wedges or squares. Serve immediately while it’s hot and the crust is at its absolute crispiest. Enjoy the fantastic smoky flavor and unique texture that only grilled pizza can offer – a truly memorable meal awaits!
Grilling pizza is truly a game-changer, especially during those warm months when you want to avoid heating up the house with a traditional oven. It’s a fun, quick, and incredibly delicious way to enjoy one of the world’s most beloved dishes. With this guide, you have all the knowledge to fire up your grill and create some unforgettable pizzas that will become a staple in your outdoor cooking repertoire. So, gather your ingredients, call your friends and family, and get ready for a delicious grilling adventure!
Grilled Pizza Recipe Summary
Created by: Kristy Still
Summary: Make this Easy Grilled Pizza, it can be made gluten-free too if you prefer as well!
Course: Grilling
Cuisine: American
Servings: 4
Prep Time: 10 mins
Cook Time: 10 mins
Total Time: 20 mins
Ingredients
- 1 Pizza Dough (Gluten-Free, Homemade, or Store-Bought)
- 1 Jar Pizza Sauce (or homemade)
- Additional Flour (for dusting work surface and pizza peel)
- Extra Virgin Olive Oil (for brushing the crust)
- Vegetable Oil (for generously coating grill grates)
Toppings:
- Shredded Mozzarella Cheese (or your preferred cheese blend)
- Ground Italian Sausage (Cooked & Drained)
- Pepperoni slices
- Sliced Tomatoes
- Fresh Herbs (such as Basil, Oregano, Thyme – to be added after grilling)
- Other Toppings of Choice (e.g., Black Olives, Green Peppers, Mushrooms, Cooked Ham, Diced Cooked Chicken, Red Onion)
Instructions
- Prepare all your sauce and toppings. Ensure any meats are cooked and drained, and dense vegetables are pre-sautéed if desired. Set everything aside near your grill.
- Roll out your pizza dough into a thin rectangle or circle, approximately 1/8 to 1/4 inch thick. Use a small dusting of extra flour on your work surface and rolling pin to prevent sticking. Carefully transfer the rolled dough to a lightly floured large baking sheet or pizza peel.
- Preheat your grill to medium-high heat (around 500°F or 260°C). Once hot, coat the grates thoroughly and generously with vegetable oil using a folded paper towel held with tongs.
- Carefully slide the pizza dough onto the heated, oiled grill grates. Close the grill lid (if applicable).
- Cook the first side of the dough for 2-3 minutes, or until the bottom is lightly browned with distinct grill marks and the dough has puffed up.
- Using tongs or a large spatula, carefully flip the partially cooked pizza dough over. Lightly brush the cooked side (now facing up) with extra virgin olive oil.
- Working quickly, spread your pizza sauce evenly over the crust, then sprinkle with shredded cheese, and add your chosen toppings.
- Close the grill lid and continue to grill for an additional 2-3 minutes. Monitor closely until the cheese is beautifully melted and bubbly, and the toppings are heated through and lightly browned.
- Carefully remove the grilled pizza from the grill and transfer it to a cutting board.
- Allow it to rest for a minute or two. For enhanced flavor, add fresh herbs (like basil) and an optional dusting of grated Parmesan cheese.
- Cut into slices and serve immediately while hot and crispy.
Nutrition
Serving: 1g | Calories: 339kcal | Carbohydrates: 32g | Protein: 13g | Fat: 17g | Saturated Fat: 5g | Polyunsaturated Fat: 12g | Cholesterol: 25mg | Sodium: 377mg | Fiber: 2g | Sugar: 2g
Did you make this recipe?
We’d love to see your creations! Make sure to tag #mommyhatescooking on Instagram and follow for more delicious recipes @momhatescooking!