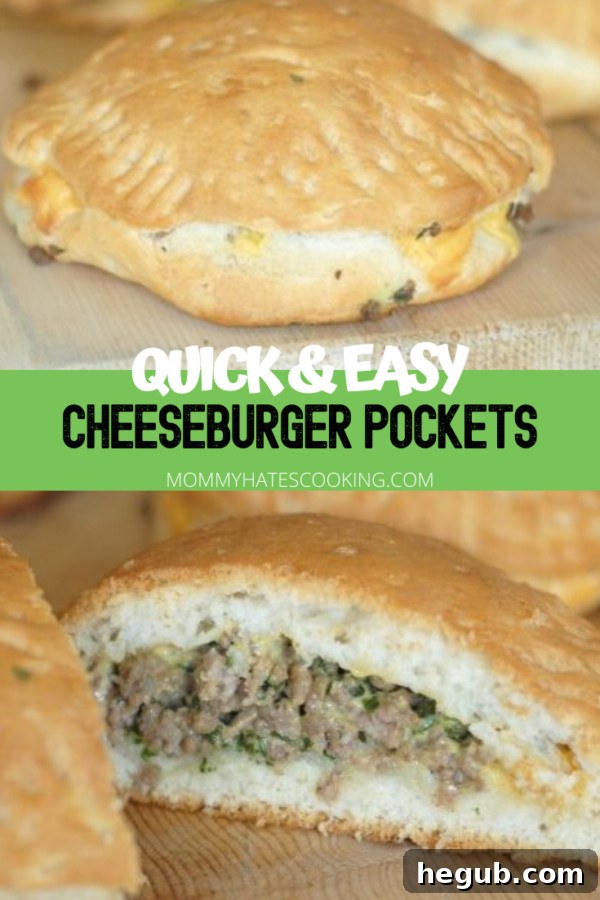
Easy & Delicious Cheeseburger Pockets: The Ultimate Family-Friendly Comfort Meal
In the whirlwind of busy weeknights, finding a meal that satisfies everyone, from the pickiest eaters to the most discerning adults, can feel like an impossible quest. But what if there was a dish that combined the beloved flavors of a classic cheeseburger with the convenience of a handheld snack? Enter the humble yet mighty Cheeseburger Pocket – a culinary hero designed for busy families seeking comfort, flavor, and ease.
This recipe for easy cheeseburger pockets is a true blast from the past for me. I first created these savory delights in the early days of my blogging journey, primarily for my son. Back then, he was an adventurous eater, a quality I sometimes miss! Life has a way of evolving, and so do palates. After years, I finally got around to recreating them, not just for nostalgia but to introduce them to my daughter and capture some fresh photos.
My son, now a bit older, has his moments with food. One day he loves them, the next he’s not so sure. It often makes me wonder if it’s true pickiness or if he simply struggles with certain food textures, particularly ground meat. Despite his changing preferences, these cheeseburger pockets have remained a family favorite. My daughter, thankfully, embraced them with open arms (and a full stomach!), proving they still hold universal appeal. It’s truly a win when you find a recipe that brings joy to the dinner table!
What Makes Cheeseburger Pockets a Family Favorite?
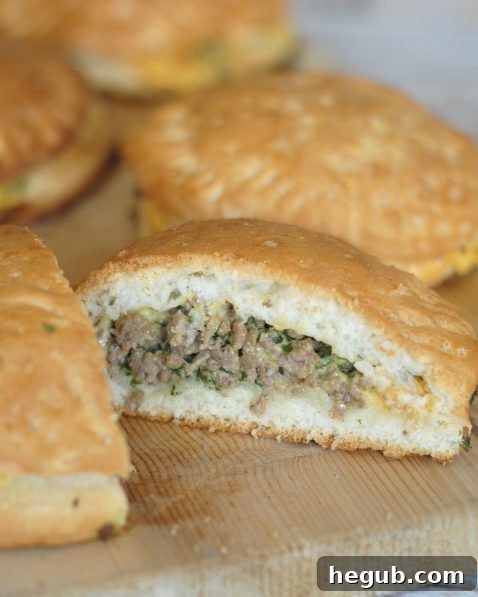
Cheeseburger Pockets are more than just a meal; they’re a delightful solution for anyone looking for a quick, satisfying, and utterly delicious dinner. Imagine sinking your teeth into a warm, flaky biscuit crust, revealing a savory filling of seasoned ground beef and gooey melted cheese. It’s all the best parts of a cheeseburger, perfectly encased and ready to be enjoyed with minimal mess.
Their appeal lies in their simplicity and versatility. With just a few basic ingredients and straightforward steps, you can whip up a batch of these comfort food gems in under 30 minutes. They’re perfect for a quick weeknight dinner, an easy lunch on the go, or even a fun party appetizer. Plus, they offer endless possibilities for customization, allowing you to tailor them to your family’s specific tastes.
Quick & Easy Dinner Solution
The beauty of these cheeseburger pockets truly shines when time is of the essence. Utilizing store-bought biscuit dough significantly cuts down on prep time, making this recipe accessible even on your busiest days. Browning the ground beef and assembling the pockets takes mere minutes, and the oven does the rest, transforming simple ingredients into a golden-brown, cheesy masterpiece. It’s a lifesaver for parents who want to serve a homemade meal without spending hours in the kitchen.
A Handheld Delight for All Ages
There’s something inherently fun about food you can eat with your hands. These pockets are perfectly portioned for little hands, making them an instant hit with children. No forks or knives required, just pure, unadulterated enjoyment. For adults, they offer a nostalgic trip to childhood favorites, bringing a sense of warmth and comfort with every bite. They are ideal for lunchboxes, picnics, or even a casual movie night dinner.
Customizable for Every Palate and Diet
One of the greatest strengths of this cheeseburger pocket recipe is its adaptability. Whether you have picky eaters or simply want to experiment with different flavors, these pockets are your canvas. You can switch up the type of cheese, add various vegetables, or even change the ground meat. This flexibility ensures that everyone at the table can enjoy a version tailored to their preferences, preventing mealtime battles and encouraging adventurous eating.
Mastering the Art of Homemade Cheeseburger Pockets
Making these delightful pockets is incredibly simple. The process is designed to be quick and efficient, giving you more time to spend with your family and less time worrying about dinner. Here’s a closer look at how these come together, with a few personal tips I’ve picked up along the way.
The Key Ingredient: Grands Biscuits
For this recipe, I specifically recommend using Pillsbury Grands Biscuits. Why? Because they make for wonderfully HUGE Cheeseburger Pockets! The larger size gives you more surface area to work with when flattening and sealing, and the final product is a substantial, satisfying meal. I have to say, I actually loved them like that. For the kids, I often split them in half after baking, which still makes for about 8 kid-sized servings from one can of 8 biscuits, stretching the meal further.
If Grands aren’t available, or you prefer a smaller pocket, regular canned biscuits work perfectly fine too. You could even experiment with crescent roll dough for a flakier crust or puff pastry for an extra-gourmet touch.
Sneaking in the Veggies: A Parent’s Best Friend
In my ongoing battle with picky eaters, I’ve learned that sometimes, the best approach is a stealthy one. This time, I decided to add something extra nutritious to the pockets: spinach. I chopped about a cup of baby spinach in the food processor until it was super thin. This fine chop makes it practically invisible and undetectable once mixed with the ground meat, adding a boost of vitamins without any complaints. This trick is invaluable, especially for children who are hesitant to try green vegetables.
You can apply this same strategy with other vegetables like finely diced onions, bell peppers, or even mushrooms. The key is to chop them very small so they blend seamlessly into the ground beef mixture. This addresses both the “pickiness” and potential “texture issues” that my son sometimes experiences with larger pieces of vegetables or ground meat itself.
Building Your Perfect Pocket
Once your ground beef is cooked and drained, and your spinach is finely chopped, it’s time to combine them. This mixture forms the hearty core of your cheeseburger pocket. Next, you’ll flatten the biscuits. Don’t be afraid to really press them down with your hands or a rolling pin to create a wider surface. This makes it easier to add the filling and seal the edges.
Layer the ground beef and spinach mixture onto half of your flattened biscuits, then top each with a slice of American cheese. The cheese will melt beautifully, binding the filling together and adding that classic cheeseburger flavor. Finally, place another biscuit on top, stretching and sealing the edges with a fork to create a secure pocket. This ensures all that cheesy goodness stays inside during baking.
Bake until golden brown, and you’ll have a batch of delicious, satisfying Cheeseburger Pockets ready to be devoured. They are kid-friendly, and I promise, you’ll enjoy them just as much!
Cheeseburger Pockets
Created by: Kristy Still
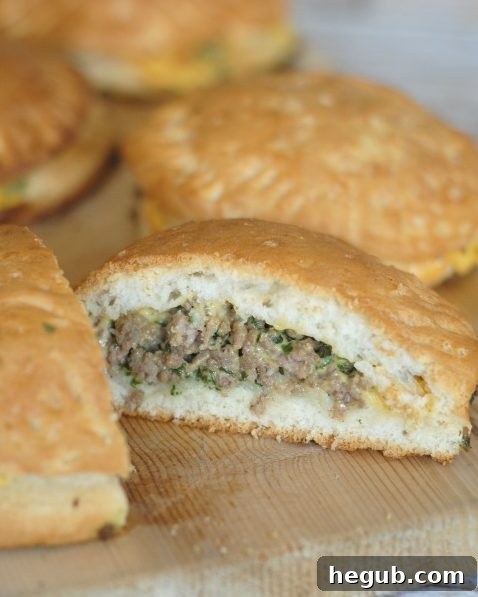
Make these Easy Cheeseburger Pockets that will soon be a comfort meal favorite!
Cuisine: American
Servings: 4 Servings
Prep Time: 10 mins
Cook Time: 20 mins
Total Time: 30 mins
Ingredients
- 1 Can of Pillsbury Grands Biscuits (8 Count)
- 1 lb Ground Beef (Cooked & Drained)
- 1 Cup Baby Spinach (Chop it finely in Food Processor)
- 4 Slices of American Cheese
Instructions
- Preheat the oven to 400°F.
- Grease a baking sheet, then place 4 of the biscuits on the sheet. Flatten the biscuits with your hand or a roller to make them a bit wider.
- Mix together the drained ground beef and the chopped spinach.
- Top each biscuit with the ground beef mixture and then a slice of cheese.
- Then, place another biscuit on top of each cheese covered biscuit, pulling it to fit and sealing it with the ends of a fork.
- Bake these for 10 minutes on 400°F or until golden brown.
Nutrition
Serving: 1 Servings | Calories: 417kcal | Carbohydrates: 9g | Protein: 35g | Fat: 26g | Saturated Fat: 11g | Polyunsaturated Fat: 12g | Trans Fat: 2g | Cholesterol: 117mg | Sodium: 513mg | Sugar: 2g
Serving Suggestions and Delicious Sides
Once your cheeseburger pockets emerge from the oven, golden and fragrant, the next step is to decide how to serve them. These versatile pockets pair beautifully with a variety of sides, making them adaptable to any meal. For a classic diner experience, serve them alongside crispy french fries or onion rings. A simple side salad with a tangy vinaigrette offers a fresh contrast and adds a healthy touch to balance the meal.
Don’t forget the condiments! Ketchup, mustard, or even a special burger sauce can elevate the experience. Pickles, either inside the pocket or on the side, add a delightful crunch and tanginess that complements the rich cheeseburger flavor. For a heartier meal, a bowl of tomato soup or a creamy coleslaw would also be excellent choices.
Make Ahead & Storage Tips for Your Convenience
Cheeseburger Pockets are not only easy to make but also excellent for meal prep and leftovers. Their robust nature makes them perfect for storing and reheating, ensuring you have a delicious meal ready whenever hunger strikes.
Can I Prep Them Ahead?
Absolutely! You can prepare the ground beef and spinach mixture in advance and store it in an airtight container in the refrigerator for up to 2-3 days. When you’re ready to bake, simply assemble the pockets and pop them in the oven. For even quicker assembly, you can fully assemble the pockets (before baking), place them on a parchment-lined baking sheet, and freeze them until solid. Once frozen, transfer them to a freezer-safe bag. When ready to bake, bake from frozen, adding a few extra minutes to the cooking time until golden brown and heated through.
Storing Leftovers
Any leftover baked cheeseburger pockets can be stored in an airtight container in the refrigerator for up to 3-4 days. They make for fantastic next-day lunches or quick snacks.
Reheating Instructions
For best results, reheat cheeseburger pockets in the oven or an air fryer. This will help crisp up the biscuit crust again. Place them on a baking sheet and heat at 350°F (175°C) for about 10-15 minutes, or until heated through and the crust is crisp. Microwaving is an option for speed, but the crust may become soft.
Common Questions About Cheeseburger Pockets
What kind of ground meat can I use?
While ground beef is traditional, you can easily substitute it with ground turkey, ground chicken, or even a plant-based ground meat alternative for a different flavor profile or to accommodate dietary preferences.
Can I use other types of cheese?
Yes! American cheese is classic for its meltiness, but cheddar, mozzarella, Colby Jack, or even a spicy pepper jack would be delicious variations. Feel free to use your favorite cheese!
How do I prevent them from opening during baking?
The key to keeping your pockets sealed is to firmly crimp the edges with a fork. Make sure the dough is completely sealed around the filling. If you notice any small gaps, gently pinch them together. Sometimes a little egg wash on the edges before crimping can also help.
Can I freeze baked cheeseburger pockets?
Yes, baked cheeseburger pockets freeze well! Allow them to cool completely, then wrap each one individually in plastic wrap and place them in a freezer-safe bag or container. They can be stored in the freezer for up to 2-3 months. Reheat from frozen in the oven at 350°F (175°C) for about 20-30 minutes, or until thoroughly heated.
Enjoy Your Homemade Cheeseburger Pockets!
There you have it – a truly easy, customizable, and incredibly delicious recipe for Cheeseburger Pockets. This dish is a testament to how simple ingredients can come together to create a memorable and satisfying meal for the entire family. Whether you’re navigating the challenges of picky eaters, searching for a quick weeknight dinner, or just craving some good old-fashioned comfort food, these pockets deliver every time.
So, gather your ingredients, enlist the help of your little chefs (if they’re willing!), and get ready to enjoy a meal that’s as fun to make as it is to eat. We hope these cheeseburger pockets become a beloved staple in your home, just as they have in ours.
Did you make this recipe?
Make sure to tag #mommyhatescooking on Instagram and follow for more @momhatescooking
Pin Recipe
Share on Facebook