
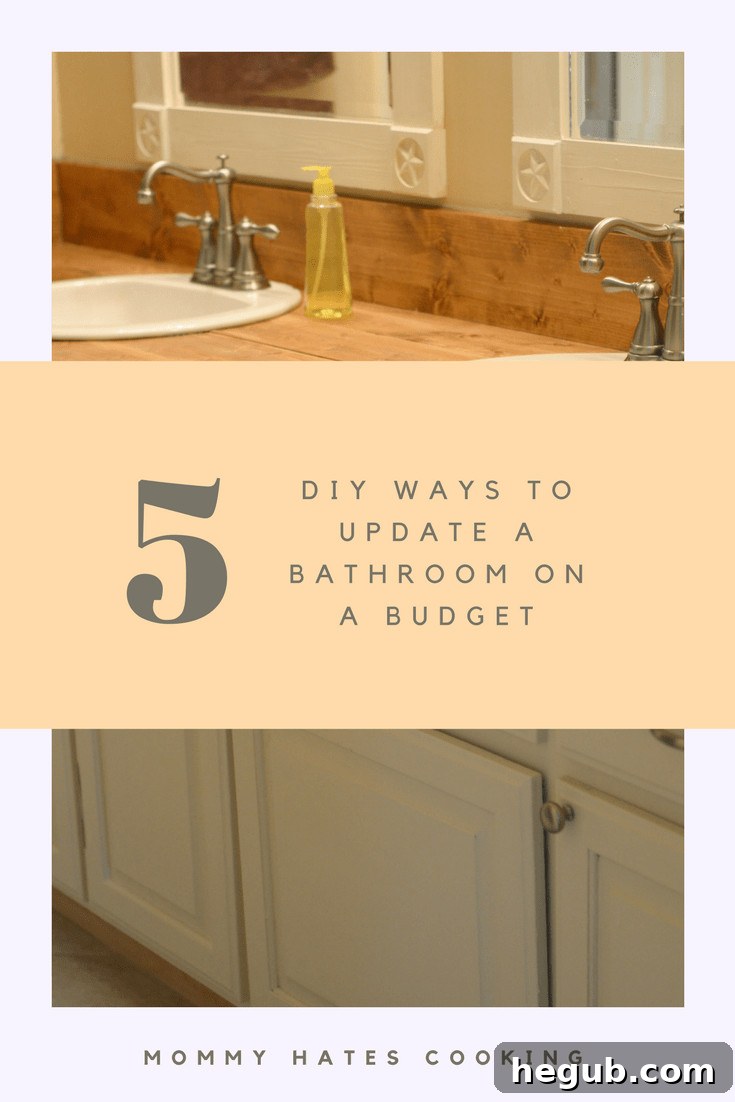
Transform Your Bathroom on a Budget: 5 DIY Tips with Lowe’s
This post is proudly sponsored by Lowe’s. All thoughts and opinions expressed are genuinely my own, reflecting my personal experiences and dedication to creating beautiful, functional spaces on a realistic budget.
Embarking on a home renovation journey can be both exciting and overwhelming. My husband and I moved into what we affectionately call our “forever home” nearly four years ago, and the list of projects we’ve tackled since then is truly extensive. From major overhauls to subtle cosmetic enhancements, our home has been a constant canvas for our DIY aspirations. While updating every corner felt like a monumental task, certain areas immediately stood out as priorities.
At the top of our initial renovation wish list were two crucial spaces: the master bathroom and the pantry. The pantry, surprisingly, was non-existent when we first viewed the house. What started as a plan to install a custom shelving unit quickly turned into a delightful discovery last summer. After knocking out an old built-in, we found a full-sized pantry hidden behind it! It was an unexpected “Christmas in July” moment, needing only a few shelves and doors to become fully functional. This discovery taught us an invaluable lesson about embracing the unexpected in home projects.
With the pantry sorted, our focus naturally shifted to the master bathroom. However, as often happens with home renovations, life threw a curveball. Our upstairs bathroom, rarely used, developed unforeseen issues that demanded immediate attention. This unforeseen expense consumed nearly all the budget we had allocated for our master bathroom transformation. It felt ironic that the space we used the least became the biggest financial drain, leaving us with a significantly reduced budget for our primary retreat.
Embracing Creativity: Our Journey to a Budget-Friendly Master Bathroom Renovation
The unexpected budget redirection forced us to re-evaluate our plans for the master bathroom. Instead of despairing, we saw it as an opportunity to get truly creative and demonstrate that a stunning bathroom update doesn’t require a hefty investment. This challenge led us to discover these 5 DIY Ways to Update a Bathroom on a Budget, proving that ingenuity and a little elbow grease can go a long way.
As avid DIYers, Lowe’s has become a second home for us. It’s not uncommon for my husband and I to visit multiple times a week, constantly sourcing materials and inspiration for our ongoing projects. Their extensive selection and commitment to supporting homeowners, regardless of budget, have been invaluable to our renovation endeavors. In fact, our local Lowe’s even offers free design services for bathrooms and kitchens, a resource we initially tapped into for our master bathroom.
We met with a talented designer who meticulously sketched out a dream master bathroom, a vision of elegance and functionality. However, the unforeseen upstairs bathroom emergency meant our grand plans had to be significantly scaled back. This shift meant we would be tackling most of the master bathroom renovation ourselves, relying on clever solutions and cost-effective materials rather than a complete overhaul. It was a testament to the fact that even with reduced funds, a beautiful and updated space is entirely achievable.
Addressing the Master Bathroom’s Challenges
Beyond the somewhat “wonky” layout of our master bathroom, there were several immediate elements that simply didn’t align with our aesthetic or functional needs. Firstly, the closet, which sits directly behind the master bathroom vanity, lacked a door. This open access meant our often-less-than-organized closet was always on display, an unsightly distraction we wanted to remedy.
The existing vanity was another point of contention. Its dark wood finish clashed with the lighter, country-chic scheme we envisioned for our master bedroom and bathroom. It felt heavy and outdated, dragging down the entire space. But perhaps the most glaring eyesore was the black tiled countertops. They were excessively dark, making the room feel smaller and failing to reflect my personal style, which leans towards bright, airy, and inviting spaces. These dark elements were definitely not in line with my preferred “country chic” aesthetic.
With a clear understanding of the areas needing improvement and a firm budget in mind, we formulated our game plan. Our goal was to achieve a significant transformation without breaking the bank. Here are the five brilliant tips we utilized to update our bathroom beautifully and affordably, proving that a dream bathroom is within reach, even on a tight budget.
5 Transformative Ways to Update a Bathroom on a Budget
- 1. Get Creative with Countertops: Affordable Elegance
Replacing countertops can be one of the most expensive parts of a bathroom renovation, but it doesn’t have to be! We opted to replace our dated black tile countertop with a real wood top. This DIY approach is surprisingly easy and offers immense visual impact. You can source a durable piece of wood, cut it to size, and then apply your choice of stain to match your desired aesthetic. The final, and most crucial, step is to generously apply a high-quality water-protective sealer. This ensures the wood stands up to the moisture inherent in a bathroom environment. The result was absolutely stunning, injecting warmth and a natural feel into the space, all for a fraction of the cost of traditional countertop materials. It’s a fantastic way to achieve a custom look without the custom price tag, creating an inviting and unique focal point.
- 2. Paint, Paint, Paint: The Ultimate Budget Refresher
Never underestimate the power of a fresh coat of paint. It is arguably the most impactful and budget-friendly way to update any room, especially a bathroom. A new color scheme can instantly brighten a dark space, make a small bathroom feel larger, or infuse a pop of personality. Don’t just stop at the walls; consider painting the trim, baseboards, and even the ceiling for a truly cohesive and refreshed look. When choosing paint for a bathroom, opt for formulations specifically designed for high-moisture areas, as these often contain mildew-resistant properties. The transformation that a few cans of paint can achieve is truly remarkable, providing a clean canvas for all your other design elements.
- 3. Revamp Cabinets with a Rust-Oleum Cabinet Kit: New Look, Old Structure
Replacing bathroom cabinets can be a significant expense, but a cabinet refinishing kit offers an incredible alternative. My absolute favorite product for this task is the Rust-Oleum Cabinet Transformations Kit. I have personally used this kit in all our bathrooms and even our entire kitchen, witnessing its ability to completely transform dated cabinetry into a modern, fresh look. For our master bathroom vanity, I chose the ‘Quilter’s White’ color, which immediately brightened the space and harmonized with our country-chic theme. These kits come with everything you need – cleaner, deglosser, bond coat, decorative glaze (optional), and protective top coat – making the DIY process straightforward. It’s an incredibly cost-effective way to achieve the look of brand-new cabinets without the hassle or expense of a full replacement, and it’s readily available at Lowe’s.
- 4. Add a Curtain for Privacy and Style: Solving Design Dilemmas
The missing closet door in our master bathroom was a persistent aesthetic and functional issue. Many homes, particularly those built in the 1970s and 80s, feature open closet designs in bathrooms. To solve this common dilemma affordably, we opted for a simple yet elegant solution: adding curtain panels and a rod inside the closet opening. This created an immediate visual divider, providing privacy and neatly concealing any clutter. At Lowe’s, I found beautiful turquoise curtains that perfectly complemented the new cream and white color scheme of our bathroom, adding a much-needed pop of color and texture. This simple addition brought a touch of softness and sophistication, proving that creative fabric choices can elegantly solve architectural shortcomings on a tight budget.
- 5. Integrate Smart Storage Systems: Organize and Beautify
Clutter can quickly undermine the beauty of an updated bathroom. Integrating smart storage solutions is not just about organization; it’s about enhancing the overall aesthetic and functionality of the space. We invested in some lovely baskets from Lowe’s to stylishly contain my seemingly endless supply of hair products and other bathroom essentials. Think beyond simple baskets; consider floating shelves for displaying decorative items and neatly folded towels, or over-the-toilet storage units to maximize vertical space. Choosing storage pieces that align with your bathroom’s style – whether wicker for a rustic feel, sleek metal for modern, or clear acrylic for minimalist – helps them blend seamlessly and elevate the room’s design. Effective storage keeps your countertops clear, your products accessible, and your bathroom looking serene and organized.
By implementing each of these budget-friendly strategies, we achieved a gorgeous, transformed master bathroom without compromising on style or functionality. While it certainly required a significant amount of DIY effort, the payoff was immense. My husband and I are absolutely thrilled with the results; the space now flows naturally with our master bedroom’s color scheme and feels truly reflective of our personal style. It’s a testament to how small, thoughtful changes can create a dramatic impact.
I am incredibly pleased with how we managed to refresh our master bathroom on a constrained budget, and these proven tips are now guiding our next project: updating our half bathroom. If we can achieve such a transformation, you can too!
Are you feeling inspired to tackle your own bathroom update? It’s time to envision the possibilities and start working towards your dream bathroom, one budget-friendly step at a time.
This is a sponsored post written by me on behalf of Lowe’s.